

What are the steps?
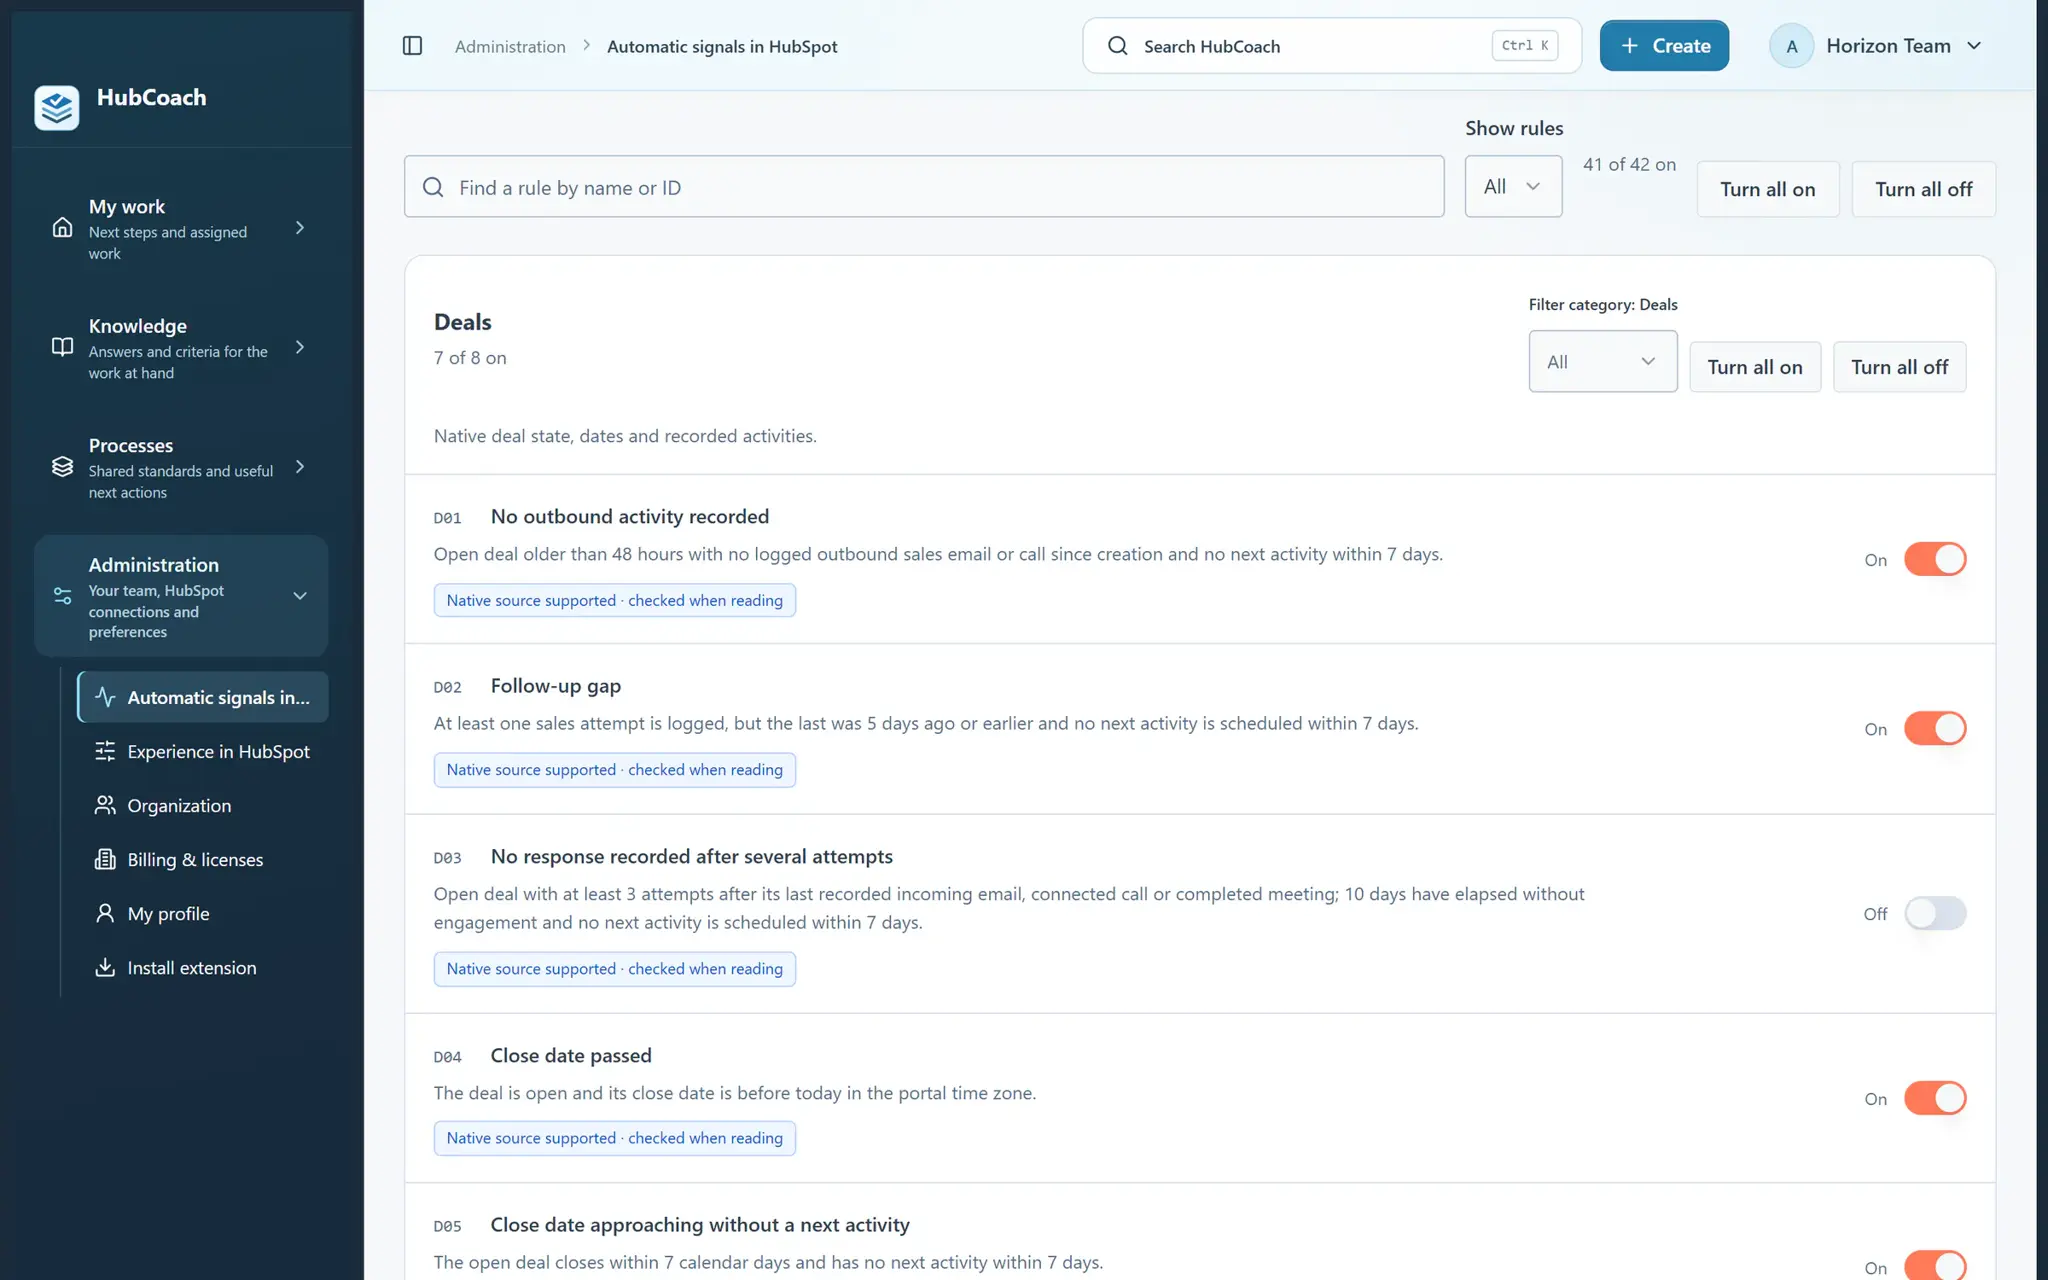
- As an administrator, open Administration → Automatic signals in HubSpot.
- Choose Organization or a portal. All 42 native checks start enabled; a portal inherits organization settings until you customize it.
- Search and filter enabled or disabled rules in each category. Use Enable all or Disable all for the whole library or one category.
- Checks use native properties, associations and marketing statistics. Client-specific criteria belong in manually created rules. For a portal, expand Inspect native sources to browse properties and check a record without changing it.
- Save changes. Use the HubCoach extension, signed in, on an enabled and authorized HubSpot portal.
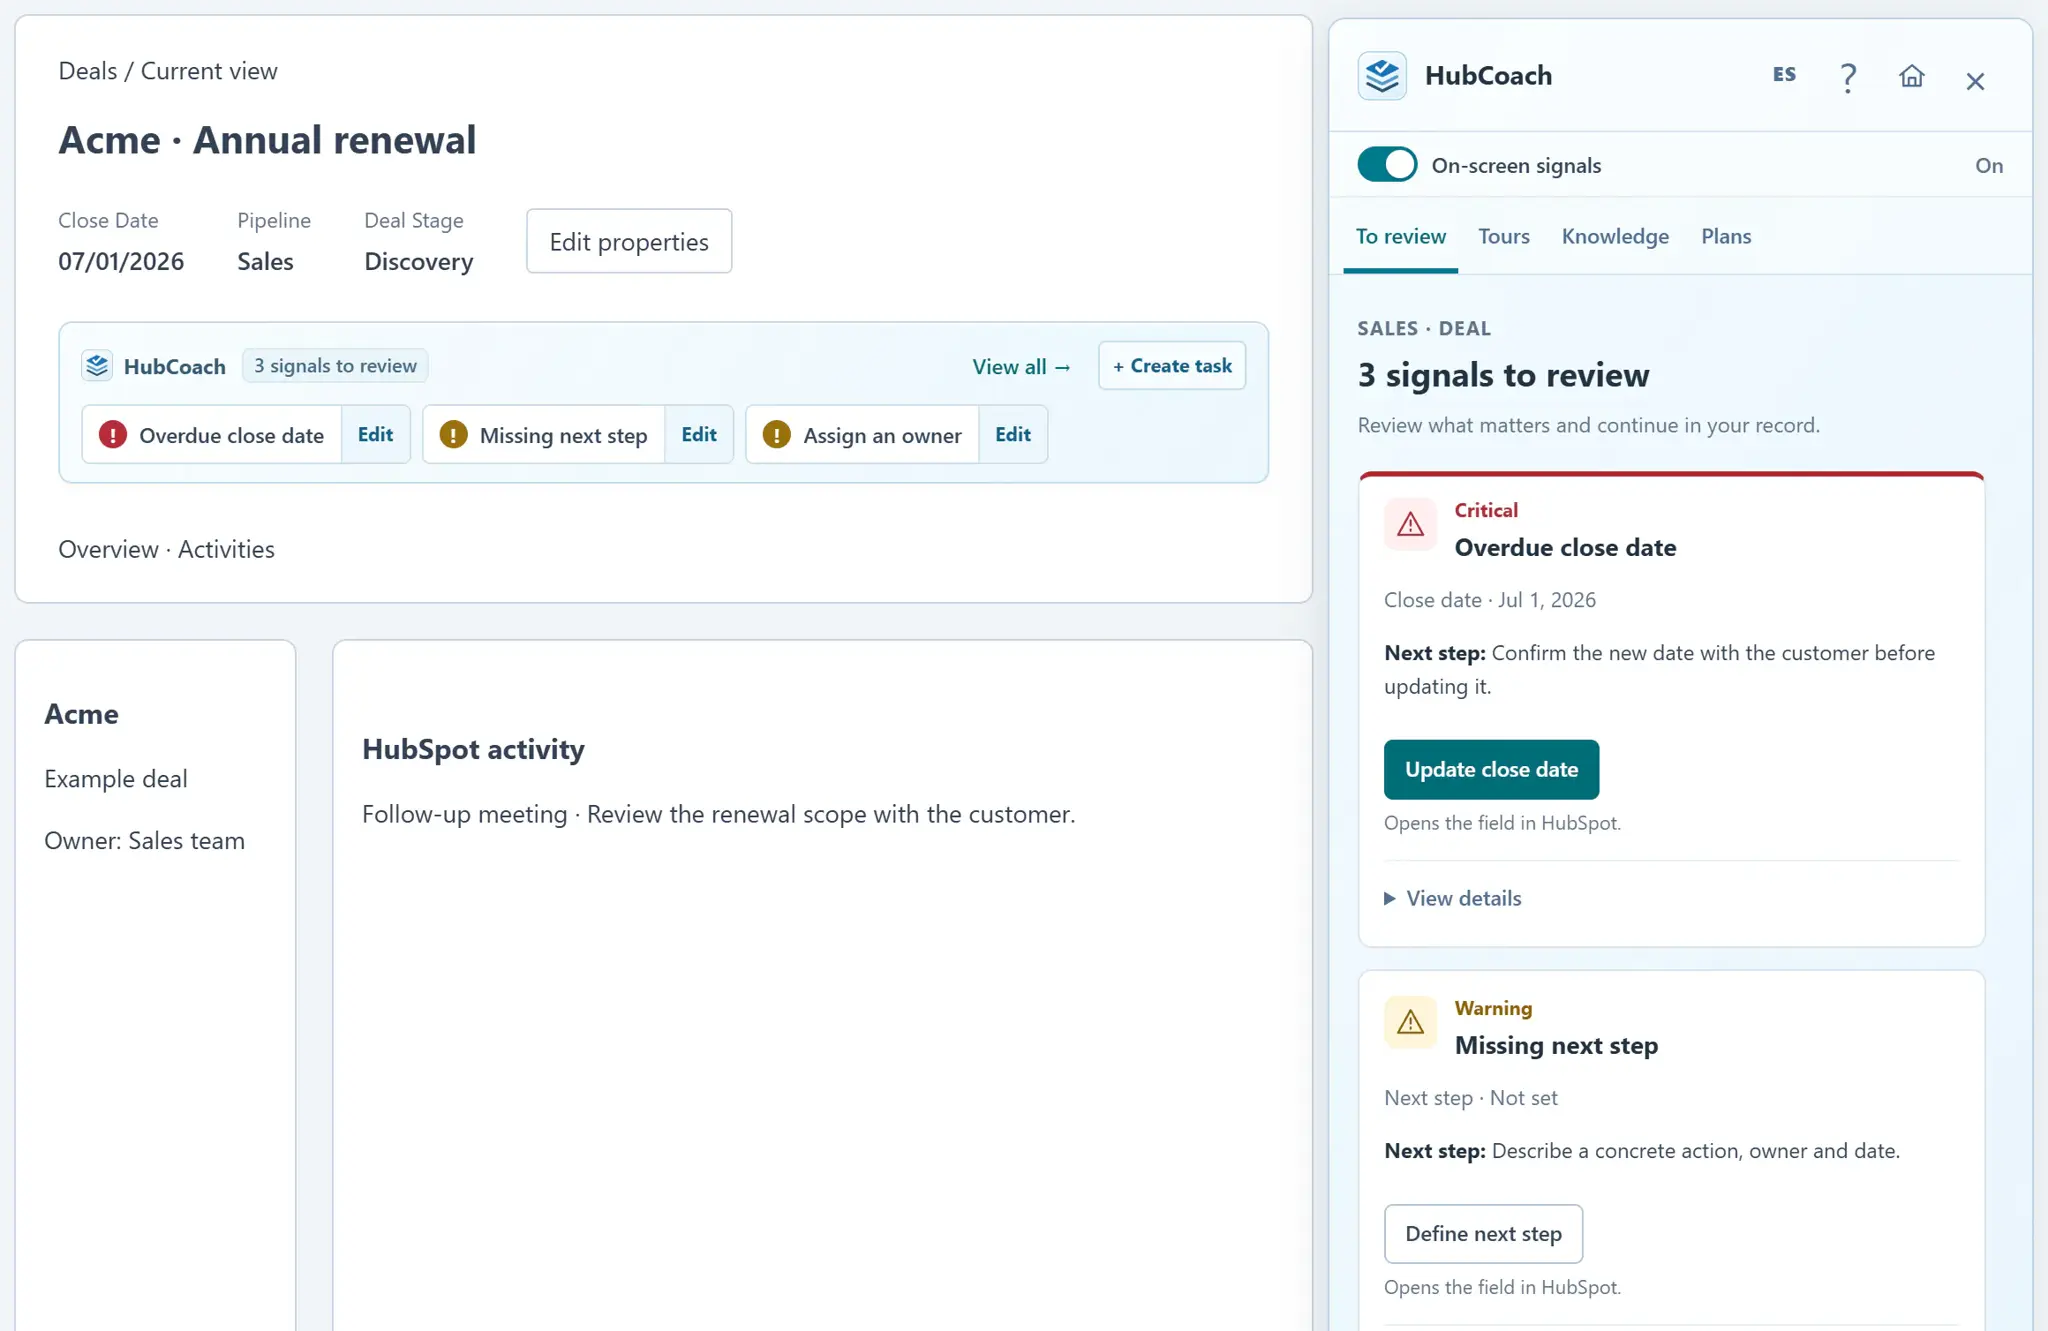
- On supported HubSpot tables and boards, review the severity rail and critical title. Use the summary buttons to filter automatic signals for loaded records. Open the record link before editing its close date.
- If a source is incomplete, its name appears in the panel while other rules remain active. A denied source requires reviewing permissions on the original HubSpot connection; enabling the rule does not grant access.
What does it look like in practice?
- Example
Turn off D04 for one portal while keeping it enabled for the rest of your organization.
What should you keep in mind?
Where should you start adjusting the checks?
- Leave everything on for a weekSee which signals really appear in your portal before deciding.
- Switch off what your team does not useFor example, the ticket checks if the team does not work in Service Hub yet.
- Use portal exceptionsWhen one portal works differently from the rest of the organization.